const - JS | lectureAdvanced DOM and Events
Intersection Observer API

In this lecture, we will implement the same sticky navigation from the previous lecture, but this time we will use the Intersection Observer API. But first, let's first understand what the Intersection Observer API is, and why is it so helpful.
The Intersection Observer API allows our code to observe changes to how a certain target element intersects another element, or how it intersects the viewport. From this definition, I think you can see that this will actually be useful in implementing our sticky navigation. But before we start working on the code, let's first understand how the Intersection Observer API works.
To use the Intersection Observer API, we first need to start by creating a new intersection observer. This new observer takes two arguments - a callback function and an options object, but more about that later.
const observer = new IntersectionObserver();Once the observer created, we can now use it to observe a certain target element. This is done by calling the observer's observe method, which takes a single argument - the target element.
/**
 * Section 1 is an element we already selected in the previous lecture
 * If you didn't go through the previous lecture, please do so and download
 * the starter code from there.
 */
observer.observe(section1);
The above will actually make sense once we create the callback function and the options object. Let's start with the options object. The first property required in the options object is the root property. This property is the element that the target element will be intersecting. In other words, it is the element that we want our target element (section1) to intersect. By default, this property is set to null, which means that the target element will intersect the entire viewport.
const observerOptions = {
  root: null,
};
The next property we need to set is the threshold property. This is the percentage of intersection at which the observer's callback will be called. This property can either be a single value or an array of values, which once more, represents the percentage of the target element that needs to be visible before the callback function is called. For example if we want to detect when the target element is 50% visible, we can set the threshold property to 0.5. If we want to call the callback function every time visibility passes another 25%, we can set the threshold property to [0, 0.25, 0.5, 0.75, 1]. By default, this property is set to 0, which means that the callback function will be called as soon as even a single pixel of the target element is visible. And a threshold of 1 means that the callback function will be called only when the entire target element is visible.
Might sound confusing, but once we setup our callback function then we will see what actually happens in practice. For now let's just set the threshold property to 20% which is 0.2.
const observerOptions = {
  root: null,
  threshold: 0.2,
};
So, once we create our callback function, it will be called each time the observed element (section1) intersects the root element at the threshold we set. And this happens no matter if we are scrolling up or down. Take note of this because, this is actually a bit hard to figure out from reading the documentation.
Let's now create our callback function. The observer callback function will get called with two arguments - an array of entries and the observer itself.
const observerCallback = (entries, observer) => {
  // do something
};

const observerOptions = {
  root: null,
  threshold: 0.2,
};

const observer = new IntersectionObserver(observerCallback, observerOptions);
observer.observe(section1);
In this case, we are only interested in the entries, even though, sometimes, using the observer is also useful. As mentionned above the value of the threshold property can either be a single value or an array of values. And so, the entries argument is actually an array of the threshold entries. Even though we only have one value in our entries array, let's loop through it to see what we get.
const observerCallback = (entries, observer) => {
  entries.forEach((entry) => {
    console.log(entry);
  });
};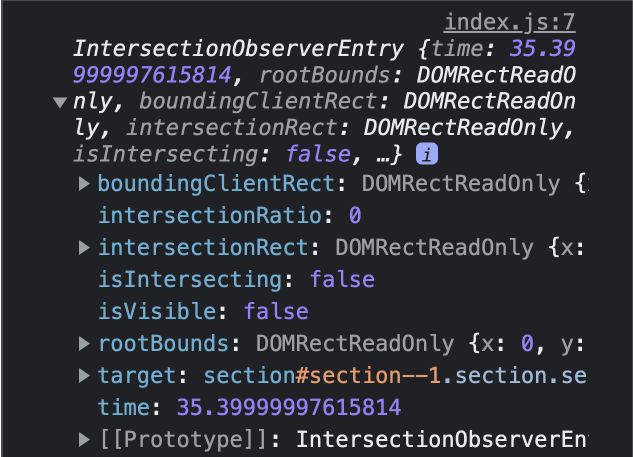
You will notice that right after the page loads, the callback function is called. And if you look at the console, you will see that you have an InterectionObserverEntry object. And that object is what we log in our forEach loop. Not really interesting at the moment, and we can also see that the intersectionRatio is at 0. But let's just scroll down and you will see what that means.
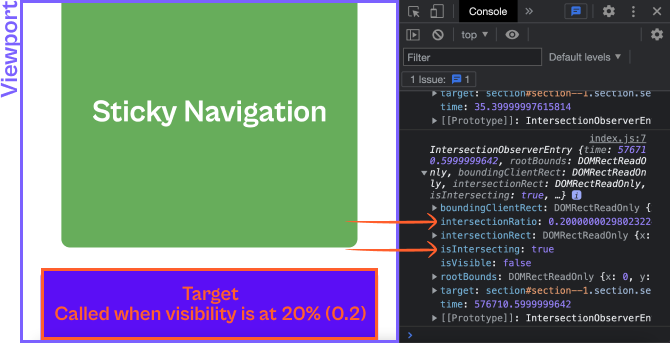
Now we get a second log in the console. And this time, it appeared because our target element came into the viewport. From the log you can see that the intersectionRatio is now at 0.2 at the time the callback function was called. And this is because we set the threshold property to 0.2. We also get the isIntersecting property set true which again is because our target element is now intersecting the viewport.
If you scroll down a little bit more, and then scroll up again, you will see that the callback function is called again.

You can see that in this new entry, the intersectionRatio is now at 0.19 and the isIntersecting property is set to false. This is because less than 20% of the target element is visible in the viewport.
We what we learned up till now, I guess you now see why this is more efficient. And that's because events are only fired in situations where we actually need them. In this case, that's the threshold we set at 20%. So this is the fundamentals of how the Intersection Observer API works. As always, you can read more about it in the MDN documentation.
Let's have a second example and instead of a single value, let's use an array of values. Let's set the threshold property to [0, 0.3].
const observerOptions = {
  root: null,
  threshold: [0, 0.3],
};
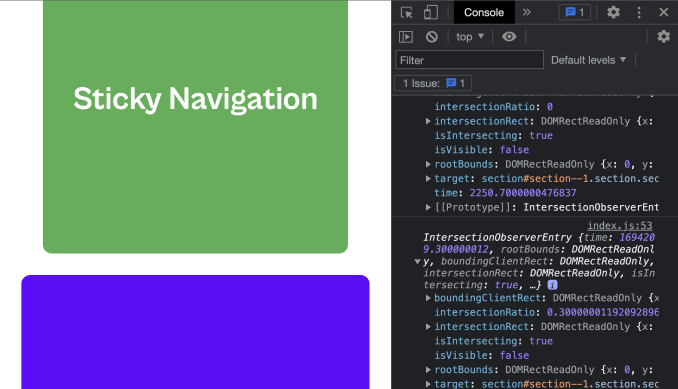
As you can see, at initial page load (first log from the above image), just like the previous example, the callback function is called, the intersectionRatio is at 0 and the isIntersecting property is set to false. This is because the target element is not yet visible in the viewport. But as soon as the target element becomes visible in the viewport (second log), the callback function is called again. And this time, still at intersectionRatio of 0, but now the isIntersecting property is set to true. And this is because the target element is now visible in the viewport.
📝 Note however that, at initial page load the isIntersecting property is not always false. It depends on the position of the target element in the viewport. If the target element is already visible in the viewport, then the isIntersecting property will be set to true.
Now, if you scroll down a little bit more, you will see that the callback function is called again. And this time when we reach the 30% threshold.
If we keep scrolling down, you will see that the callback function is called again. And this time because the taget's visibility in the viewport is now less than 30%.
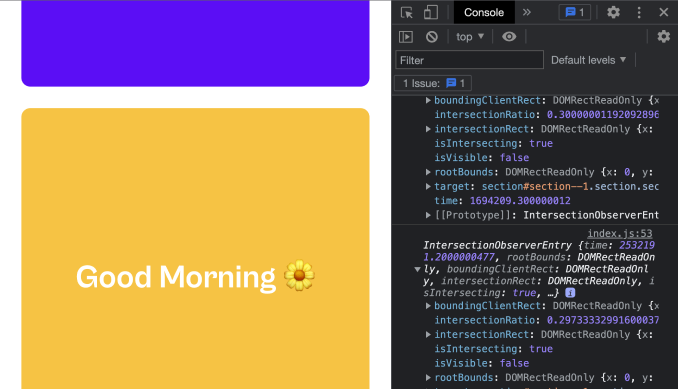
You will however notice that the isIntersecting property is still set to true. This is because we set the threshold property to [0, 0.3]. And as we said above, a threshold of 0 means that the callback function will be called when the target element is visible in the viewport. And so, even though the threshold is now less than 30%, the element is still visible in the viewport. Hence the isIntersecting property is still set to true because the threshold is has a value 0 in the array.
If we continues scrolling down, and reach the point where the bottom of our target element hits the top of our viewport, we will see that the callback function is called again, which is when the intersectionRatio is at 0 and the isIntersecting property is set to false.

Let's now use this knowledge to implement our sticky navigation. The first question we need to ask ourselves is, when do we want our navigation to be sticky? In this case, let's say we want it to be sticky when the header (nav and section--intro) moves completely out of the viewport. Hence this time we are going to observe the header element.
const header = document.querySelector('.header');

// No need adding the obsever since we will not use it
const headerCallback = (entries) => {
  // do something
};

const headerOptions = {
  root: null,
  threshold: 0, // We want the callback to be called as soon as the header is out of the viewport
};

const headerObserver = new IntersectionObserver(headerCallback, headerOptions);

headerObserver.observe(header);
Let's now add the necessary logic to our callback function, which is to add and remove the sticky class to the navigation.
const headerCallback = (entries) => {
/**
* Since our threshold is just a single value we don't need to loop
* through the entries. Let' use the destructuring assignment to
* get the first entry in the array
*/
const [entry] = entries;
// If the header is not intersecting the viewport
if (!entry.isIntersecting) {
nav.classList.add('sticky');
} else {
nav.classList.remove('sticky');
}
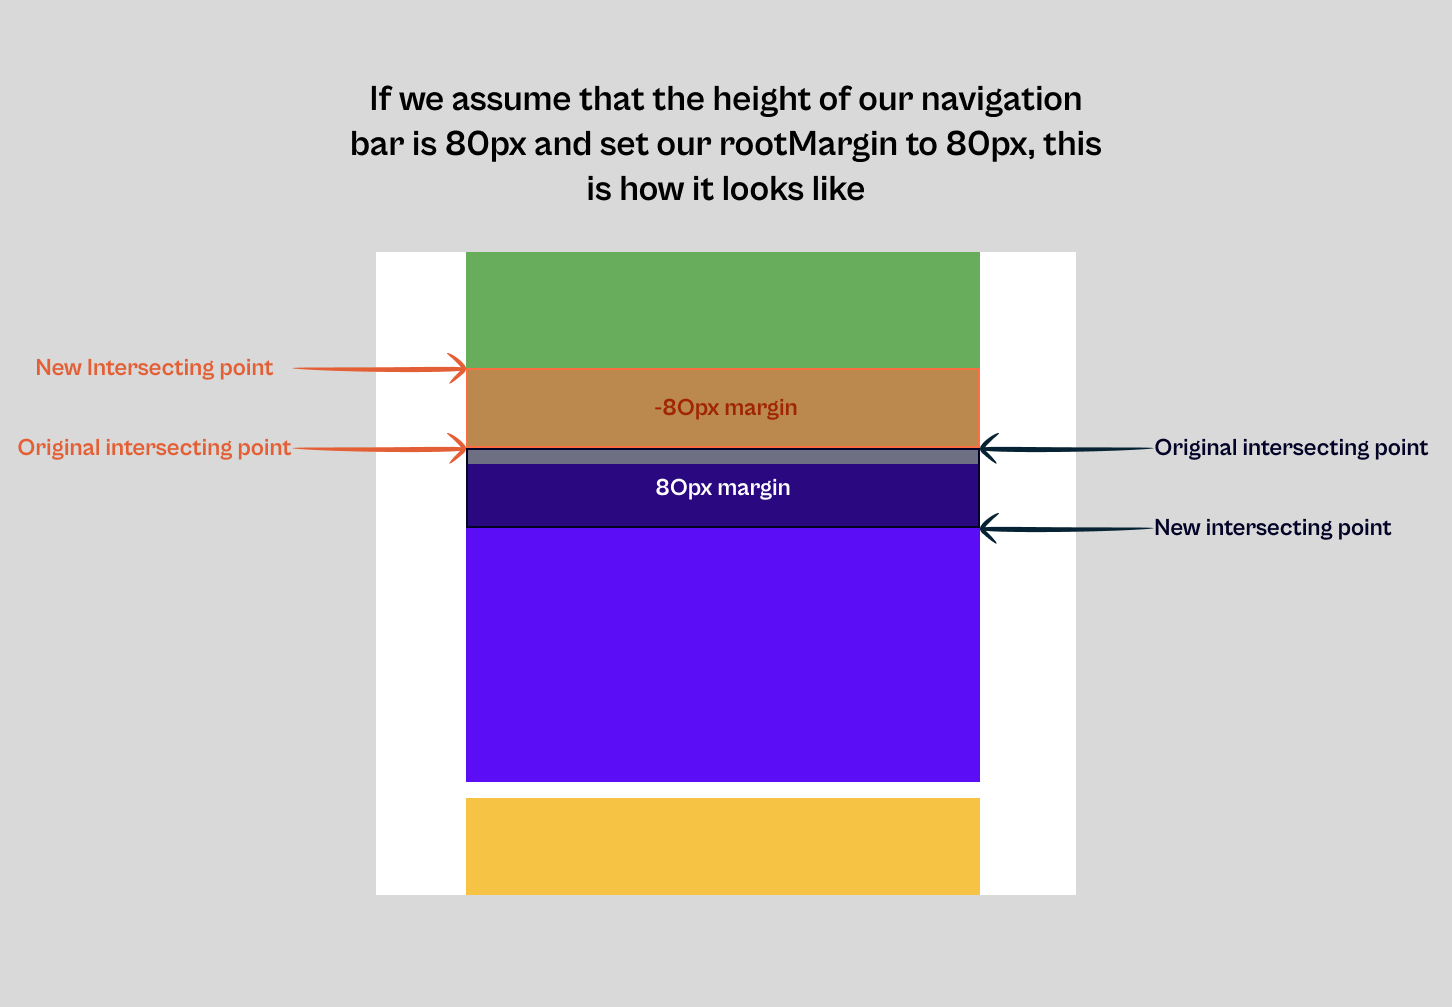
};We now have a nice sticky navigation that shows up when the header is out of the viewport, and disappears when it comes back into the viewport. But we are not really done yet. Right now you will notice that when the navigation appears, it overlaps the section that follows right after the header. What I want us to do is to make the navigation appear when the distance between the start of the section that follows the header and the top of the viewport is equal to the height of the navigation. And this is where the rootMargin property comes in.
The rootMargin property allows us to specify a margin around the root element. And this margin is used to determine when the target element is considered to be intersecting the root element. So in our case, we want to add a margin of the height of the navigation to the top of the root element. And this is how we do it.
const navHeight = nav.getBoundingClientRect().height;

const headerOptions = {
  root: null,
  threshold: 0,
  rootMargin: `-${navHeight}px`, // We want to add a margin of the height of the navigation to the top of the root element
};
Since I'm not really sure if you understand what I just said 😅 , let's have a look at the image below.
To finish this lecture note that adding a rootMargin property does not change anything to the entry object, since it's just a visual margin that gets added to the root element.