const - JS | lectureAdvanced DOM and Events
Building a Tabbed Component

In this lecture, we will implement a very popular component, the tabbed component. You will see tabbed components on may websites these days, so it's great to learn how to build one yourself. Below is a video of the tabbed component we will build in this lecture.
Before we start, go ahead and dowload the starter files from this link. Once you have downloaded the starter files, open the index.html file in your browser. Right now if you click on the tabs, nothing happens. So, let's implement that functionality.
Let's start by selecting the tabs, the tabs container and the tabs content areas.
const tabs = document.querySelectorAll('.tab');
const tabsContainer = document.querySelector('.tabs--container');
const tabsContent = document.querySelectorAll('.tab--content');
Now that we have our selections nicely done, let's now add event handlers to the tabs. Because, that is the action we actually want to handle in this component. We could do it like this:
tabs.forEach((tabEl) => {
  tabEl.addEventListener('click', () => {
    console.log('Tab clicked');
  });
});
However, as we already learned, doing it this is a bad practice. It is a bad practice because, what if for example we had like 200 tabs? Then we would have 200 copies of the above callback function. And that will simply slow down the page. So instead, let us one more time use event delegation.
Remember that for event delegation, we need to attach the event handler on the common parent element of all the elements we are interested in. In this case, the common parent element is the tabs container. So, let's do that.
tabsContainer.addEventListener('click', (e) => {
  // Do something
});
Next, let's now work on our matching strategy. We already know that we are interested in the tabs or buttons. Hence let's figure out which tab or button was clicked.
tabsContainer.addEventListener('click', (e) => {
  const clickedTab = e.target;
  console.log(clickedTab);
});
We indeed get the tab that was clicked. However, there is a problem when we click on the number on the tab. That is, when we click on the number, we don't get a button. Instead, we get a span element.

The reason for this is that, inside the button element we have a span element. And eventhough it looks like we are clicking on the button, we are actually clicking on the span element. So, we are not clicking on the button, but we still need the button. So how do we get the button? Because no matter if we click on the span element or on the button itself, we actually need the button itself because, from that button we will need to get the data attribute since it contains the number of the tab content we want to show.
One simple way to fix this eventhough it will not really fix the problem, is to do some DOM traversing and simply select the parent element. Let's see what happens when we do that.
tabsContainer.addEventListener('click', (e) => {
  const clickedTab = e.target.parentElement;
  console.log(clickedTab);
});
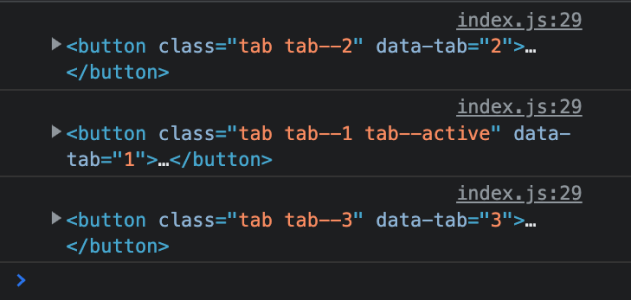
Now you will notice that when we click on the number, we get the button (1st log from the above result). And that's because it is the parent element of the span element. Now the problem (2nd log from the above result) appears when we click on the button itself. Because, now of course, we get the parent of the button element.
So, this is not the ideal solution. So, the solution to this problem is to use a method we saw in the previous lecture. The method is called closest. This method allows us to select the closest parent element that matches a given selector. So, let's use it.
tabsContainer.addEventListener('click', (e) => {
  const clickedTab = e.target.closest('.tab');
  console.log(clickedTab);
});
Now, no matter where we click, we will always get the button element. Because, now, the method searches for the closest parent with the class name tab which indeed is the button element itself.
Next let's now add the active class to the clicked tab. Because as you can see in the above video, the active tab is slightly moved up. So, let's do that.
tabsContainer.addEventListener('click', (e) => {
  const clickedTab = e.target.closest('.tab');
  console.log(clickedTab);
  clickedTab.classList.add('tab--active');
});
When you now click, you will notice that it activates the tab. Right now, the others don't go back to their original state. We will take care of that later because we first need to fix another problem. The problem is that if you click on the tab container outside of any of the buttons, i.e., the element on which we attached the listener, you will get an error.

You can see that we get null followed by an error. null is the result returned by the closest method when there is no matching parent element to be found. Hence we need to fix that by ignorinng any clicks that come from that area.
tabsContainer.addEventListener('click', (e) => {
  const clickedTab = e.target.closest('.tab');
  if (!clickedTab) return; // Usually referred to as a guard clause  console.log(clickedTab);
  clickedTab.classList.add('tab--active');
});
Let's now take care of the other tabs. That is, when we click on a tab, the other tabs should go back to their original state. So the solution to that is, before we add the active class to the clicked tab, we need to remove the active class from all the other tabs. So, let's do that.
tabsContainer.addEventListener('click', (e) => {
  const clickedTab = e.target.closest('.tab');
  if (!clickedTab) return;

  // Remove active class from all other tabs
  tabs.forEach((tabEl) => tabEl.classList.remove('tab--active'));  clickedTab.classList.add('tab--active');
});
Finally, let's activate the tab content area itself because that's the main part we are actually interested in. Remember that the information about which content area should be displayed is stored in the data attribute data-tab found on the button element. So, we need to get that data attribute and then use it to select the corresponding content area.
But first, let's also remove the active class from all the other content areas before retrieving the data attribute.
tabsContainer.addEventListener('click', (e) => {
  const clickedTab = e.target.closest('.tab');
  if (!clickedTab) return;

  // Remove active class from all other tabs
  tabs.forEach((tabEl) => tabEl.classList.remove('tab--active'));

  // Remove active class from all other content areas
  tabsContent.forEach((tabContentEl) =>    tabContentEl.classList.remove('tab--content--active')
  );
  clickedTab.classList.add('tab--active');

  // Get the content area to activate from the data attribute
  const tabContentNumber = clickedTab.dataset.tab;});
Now, we need to select the content area that we want to activate. So, let's do that.
tabsContainer.addEventListener('click', (e) => {
  const clickedTab = e.target.closest('.tab');
  if (!clickedTab) return;

  // Remove active class from all other tabs
  tabs.forEach((tabEl) => tabEl.classList.remove('tab--active'));
  clickedTab.classList.add('tab--active');

  // Get the content area to activate from the data attribute
  const tabContentNumber = clickedTab.dataset.tab;

  // Select the content area to activate
  /**
   * In the HTML, you will notice that every content area has a class name
   * `tab-content` followed by a number. So, we can use that to select the
   * content area we want to activate. For example, if the data attribute
   * `data-tab` is 1, then we want to select the content area with the class
   * name `tab-content-1`.
   */
  const tabContent = document.querySelector(    `.tab-content--${tabContentNumber}`
  );
});
All that's now left is to add the active class to the content area.
tabsContainer.addEventListener('click', (e) => {
  const clickedTab = e.target.closest('.tab');
  if (!clickedTab) return;

  // Remove active class from all other tabs
  tabs.forEach((tabEl) => tabEl.classList.remove('tab--active'));
  clickedTab.classList.add('tab--active');

  // Get the content area to activate from the data attribute
  const tabContentNumber = clickedTab.dataset.tab;

  // Select the content area to activate
  const tabContent = document.querySelector(
    `.tab--content--${tabContentNumber}`
  );

  // Add active class to the content area
  tabContent.classList.add('tab--content--active');});
Great! Now, we have a fully functional tab component. Hope you enjoyed this lecture. See you in the next one.