const - JS | lectureAdvanced DOM and Events
Event Propagation in Practice

In this lecture, we are going to see event propagation in practice, and mainly event bubbling. Before we start, download the starter files from this link. Once downloaded, open the index.html file in your browser. You should see just a simple navigation bar with links.
What we are going to do is to add event handlers to one of the links, for example Hello; and also to all of its parent elements. Then, as we click on the link, we will give all the parent elements random background colors. This will help us visualize how exactly event bubbling is happening.
Let's start by creating a function that going to generate random colors.
const randomInt = (min, max) => {
  return Math.floor(Math.random() * (max - min + 1) + min);
};

const generateRandomColor = () => {
  const r = randomInt(0, 255);
  const g = randomInt(0, 255);
  const b = randomInt(0, 255);
  return `rgb(${r}, ${g}, ${b})`;
};
Next, let's attach the event handler as I mentionned above to the Hello link as well as to all of its parent elements.
const navLink = document.querySelector('.nav__link');
const navLinks = document.querySelector('.nav__links');
const nav = document.querySelector('.nav');

navLink.addEventListener('click', function (e) {
  // Do something
});

navLinks.addEventListener('click', function (e) {
  // Do something
});

nav.addEventListener('click', function (e) {
  // Do something
});
Now, what I want to show you is what happens when we assign a background color to the Hello link. Let's do that.
navLink.addEventListener('click', function (e) {
  /**
   * Rememeber that the value of `this` keyword inside an event handler
   * is the element on which the event handler is attached.
   */
  this.style.backgroundColor = generateRandomColor();
});
You will notice that as you keep clicking on the link, the color keeps changing. But now, what if we perform the same action on the parent elements? Let's do that.
navLinks.addEventListener('click', function (e) {
  this.style.backgroundColor = generateRandomColor();
});
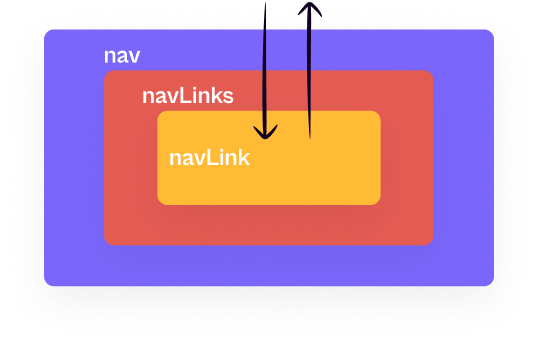
The color of the container element changes as well. So, based on what we learned from the previous lecture why do you think this is happening? Well, just as we learned before, the event actually happens at the document root, and from there it then travels down to the target element. And so in this case it is the Hello link. From there, it then bubbles up. And bubbling up means that it's as if the event had also happened in all of the parent elements. And so that is the reason why this exact event is also being handled by the listener attached to navLinks.
Moving on, what do you think will happen if we only click on the navLinks container element? Well, you will notice that the color of the link stays the same. That's because navLinks is the parent element. And so from there the event only bubbles up to its parent elements. Let's now see what happens when we perform the same action on the nav element.
nav.addEventListener('click', function (e) {
  this.style.backgroundColor = generateRandomColor();
});
We can see that the click event that happened on the link was indeed handled in all three places. So in all three elements which have a click event handler.
Let's now dig a little bit deeper and talk about the event target.
navLink.addEventListener('click', function (e) {
  console.log('navLink ', e.target);});
The target is essentially where the event originated. It is not the element on which the handler is actually attached.
Let's add the same code to the other two elements.
navLinks.addEventListener('click', function (e) {
  console.log('navLinks ', e.target);
});

nav.addEventListener('click', function (e) {
  console.log('nav ', e.target);
});
Now let's see what happens when we click on the Hello link.

One more time all the three elements got a random background color. But in the console, you will notice that the target which is navLink is the same for all three elements. And that's of course the element where the click first happened. Also, it appears in all the three handlers because all of them are essentially handling the same event. So, the event e that each handler receives is indeed the same event. And again, that's because of event bubbling.
Besides the target, there is also the current target. The current target is the element on which the event handler is attached.
navLink.addEventListener('click', function (e) {
  console.log('navLink ', e.target, e.currentTarget);
});

navLinks.addEventListener('click', function (e) {
  console.log('navLinks ', e.target, e.currentTarget);
});

nav.addEventListener('click', function (e) {
  console.log('nav ', e.target, e.currentTarget);
});
As you can see from the above result, the current target is not the same except for the navLink element. And that's because that's where the event happened, and it's also where the event handler is attached. So, the current target is the same as the target. Hence, you might have noticed that the current target is the same as the this keyword.
navLink.addEventListener('click', function (e) {
  console.log(e.currentTarget === this); // true
});
The next thing I want to show you is that we can actually stop the event propagation. All we have to do is to call the stopPropagation method on the event object.
navLink.addEventListener('click', function (e) {
  // ...
  e.stopPropagation();
});
Now, if you click on the link, you will notice that the color of the link changes, but the two parent elements did not change their background colors. Which means that the event never arrived at those two elements. That's why they weren't handled there. And again, that's because we stopped the propagation at the link level.
In practice, that's usually not a good idea to stop propagation. But I still showed it to you in case you need it in the future. There is this great article on CSS Tricks that explains some of the dangers of stopping event propagation.
As we just saw, the three event handlers that we set up above receive events from the target elements and also from the bubbling phase. In other words the event handlers are listening for click events that happen on the element itself and they are also listening for events that keep bubbling up from their child elements.
The two phases that I just described in the previous paragraph are phase 2 and phase 3 from the previous lecture. But now what about the capture phase (phase 1)? Well, as we learned, events are captured when they come down from the document root all the way to the target element. But our event handlers are not picking up these events during the capture phase. Remember?
I mentionned that addEventListener is only listening for events that happen during the bubbling phase. That's the default behaviour of this method. And the reason for that is that the capturing phase is usually irrelevant for us. On the other hand, the bubbling phase can be very useful for something called event delegation which we will talk about in the next lecture.
However, if we really do want to catch events during the capture phase, we can do that by passing a third argument to the addEventListener method. And that third argument is a boolean value, which if we set it to true, then the event handler will be listening for events during the capture phase.
/**
 * This third argument is called the `useCapture` argument.
 *
 * By default, it is set to `false`.
*/
nav.addEventListener(
  'click',
  function (e) {
    console.log('nav ', e.target, e.currentTarget);
  },
  true
);
In practice, it going to look the same, but if you look at the console, you will notice that the nav is actually the first appearing element.

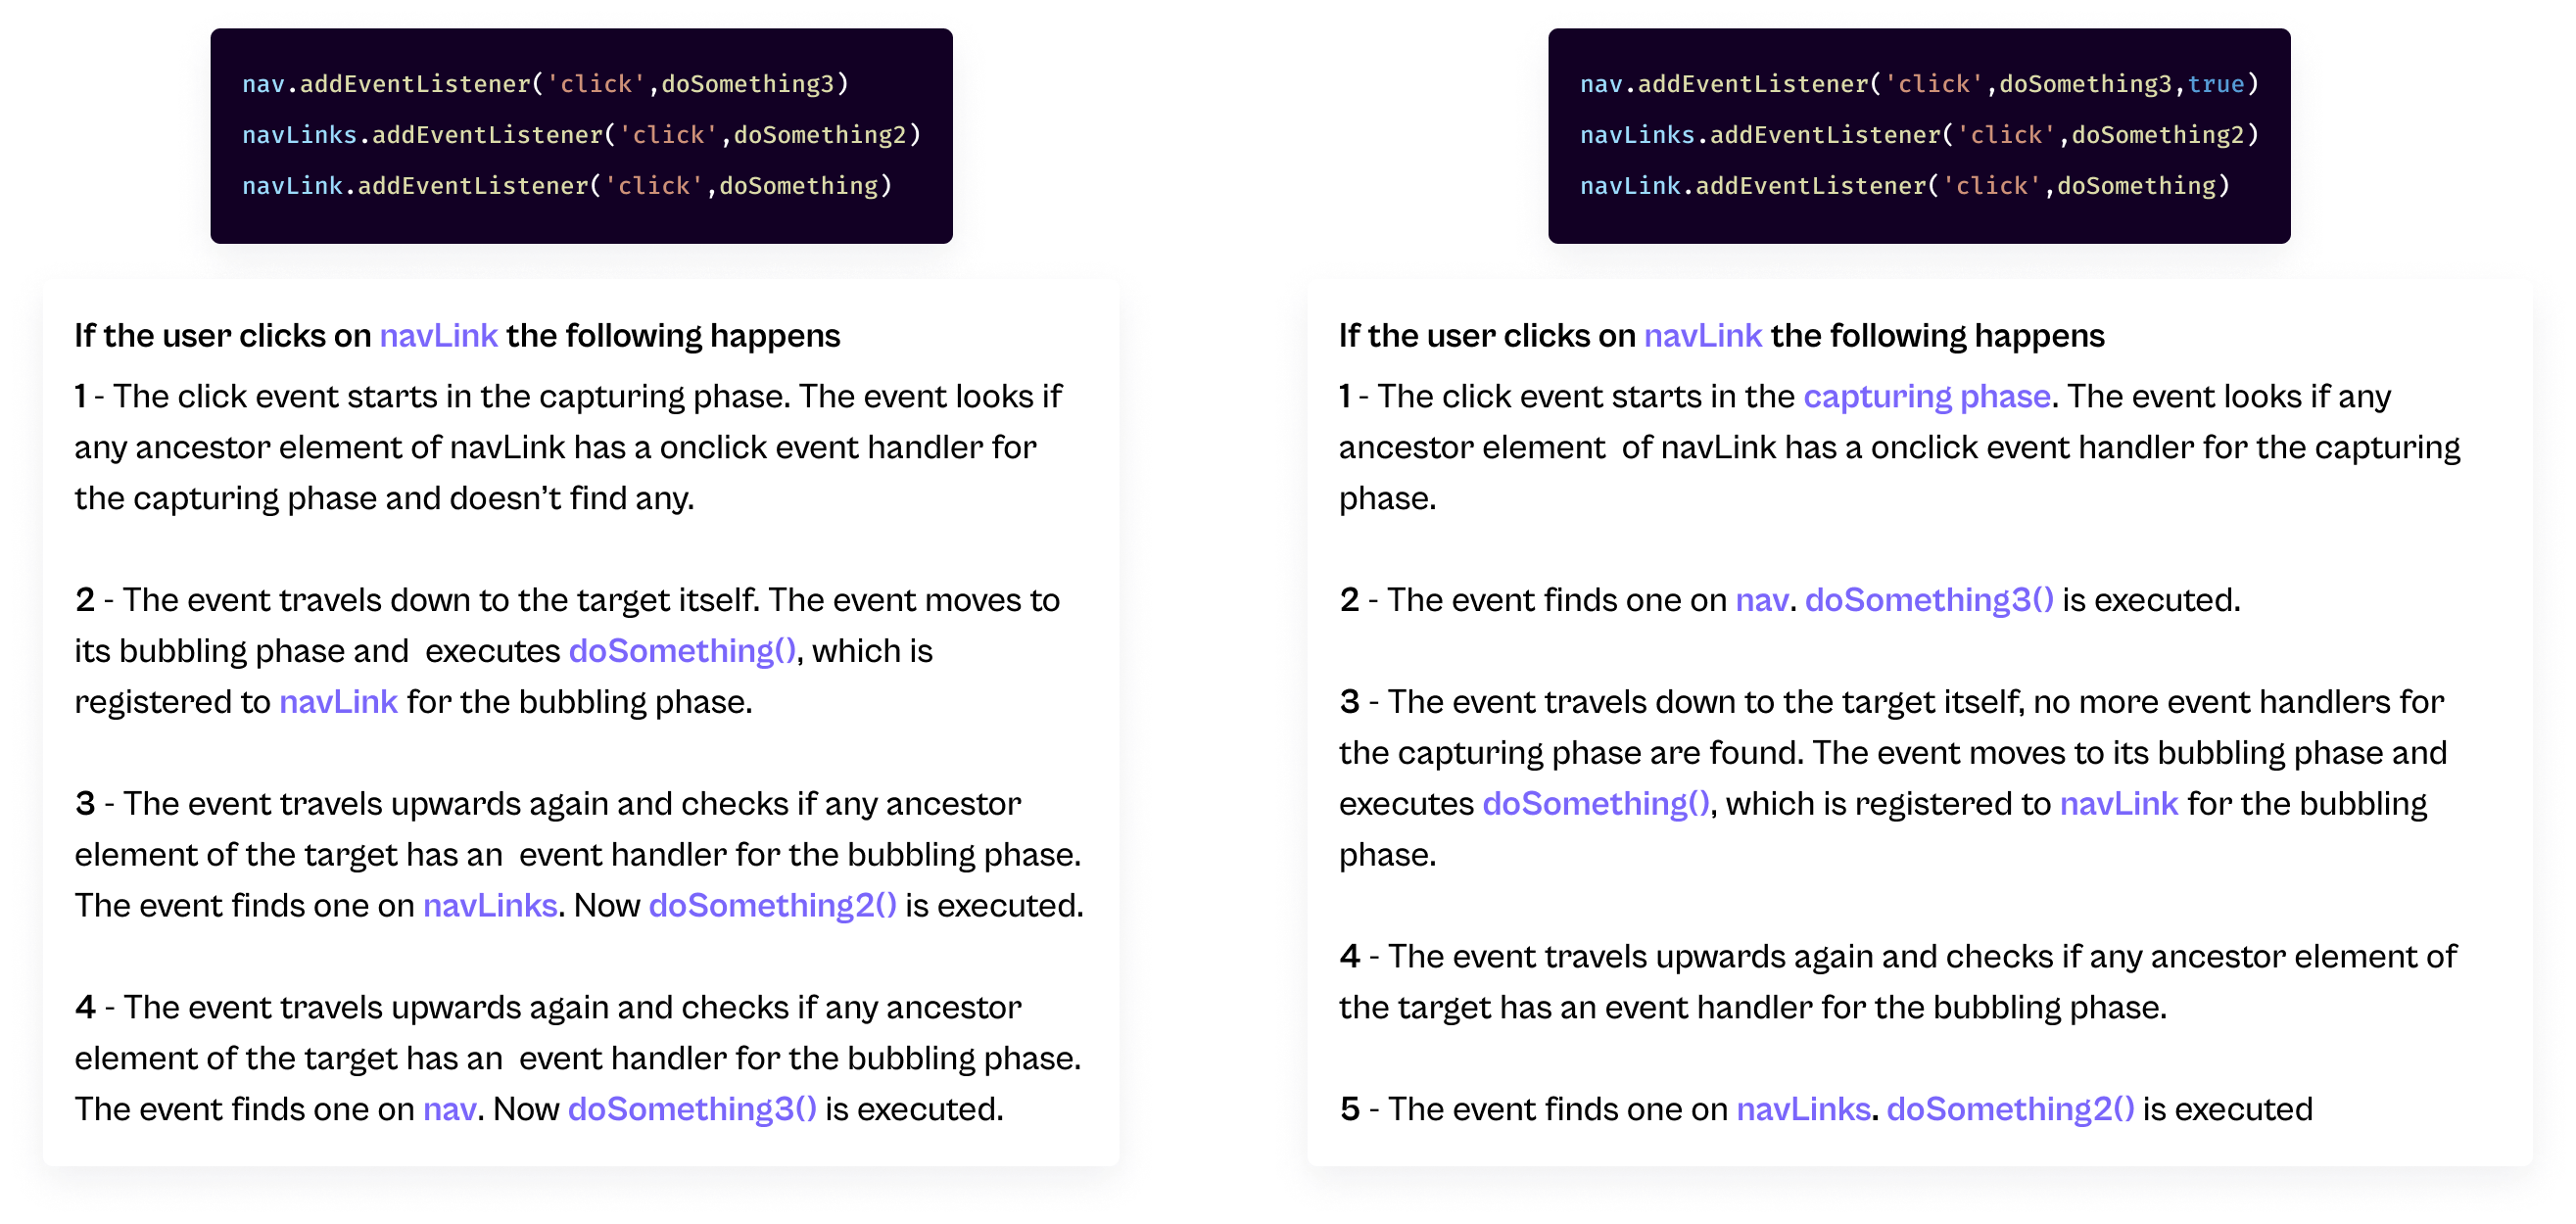
The reason why the nav is the first appearing element is because this element is now listening to the event as it is traveling down from the DOM. While the rest are listening to the event as it is travels back up .
They are still all working with the same event they are simply doing it in different phases of the event propagation. If that sounds confusing, then please take another look at the diagram from the previous lecture.
To finish this lecture below is a diagram summarizing what we just learned.

