const - JS | lectureAdvanced DOM and Events
Implementing Smooth Scrolling
In this lecture, we will implement a feature called smooth scrolling. Smooth scrolling is a feature that allows the user to scroll to a specific section of the page without the page jumping to that section. Instead, the page will scroll smoothly to that section. This is a very common feature on websites and it is very easy to implement. Below is a video of what we will be implementing.
We will see two ways of doing this. The first method is a bit more old school 😅, but this will allow me to show you a couple of interesting stuff. And then, finally, we will see the modern way of doing this. So let's get started.
Let's consider the following HTML and CSS code.
<!-- You can add more sections if you want -->
<section class="section section--one" id="section1">
  <div>
    <h2>Section 1</h2>
    <button class="btn btn-scroll-to-section-2">
      Click to Scroll to Section 2 Below
    </button>
  </div>
</section>
<section class="section section--two" id="section2">
  <div>
    <h2>Section 2</h2>
    <button class="btn btn-scroll-to-section-3">
      Click to Scroll to Section 3 Below
    </button>
  </div>
</section>
<section class="section section--three" id="section3">
  <div>
    <h2>Section 3</h2>
    <button class="btn btn-scroll-to-section-1">
      Click to Scroll to Section 1 Above
    </button>
  </div>
</section>body {
text-align: center;
}
.section {
height: 750px;
color: white;
align-items: center;
display: flex;
justify-content: center;
}
.section.section--one {
background-color: #6400ff;
}
.section.section--two {
background-color: #ff5f2d;
}
.section.section--three {
background-color: #ffc300;
}
.btn {
background: none;
color: white;
border: none;
border-bottom: 1px solid currentColor;
cursor: pointer;
}Now that we have our HTML and CSS code, let's start by selecting the buttons and the different sections we want to scroll to.
// Selecting the buttons
const btnScrollToSection1 = document.querySelector('.btn-scroll-to-section-1');
const btnScrollToSection2 = document.querySelector('.btn-scroll-to-section-2');
const btnScrollToSection3 = document.querySelector('.btn-scroll-to-section-3');

// Selecting the sections
const section1 = document.querySelector('#section1');
const section2 = document.querySelector('#section2');
const section3 = document.querySelector('#section3');
Next, let's add a click event listener to the buttons.
btnScrollToSection1.addEventListener('click', function (e) {
  // Scroll to section 1
});

btnScrollToSection2.addEventListener('click', function (e) {
  // Scroll to section 2
});

btnScrollToSection3.addEventListener('click', function (e) {
  // Scroll to section 3
});
Since, we are starting with the old school way of implementing smooth scrolling, we first need to get the coordinates of the element we want to scroll to.
btnScrollToSection2.addEventListener('click', function (e) {
  // Scroll to section 2
  const s2coords = section2.getBoundingClientRect();  console.log(s2coords);
});
The getBoundingClientRect method returns a DOMRect object containing the size and position of an element relative to the viewport.


We can also get the coordinates of the current scroll position of the page found in the window object.
btnScrollToSection2.addEventListener('click', function (e) {
  // Scroll to section 2
  const s2coords = section2.getBoundingClientRect();
  console.log(s2coords);

  console.log(`X ==> `, window.pageXOffset);  console.log(`Y ==> `, window.pageYOffset); // Corresponds to the amount scrolled from the top});
If we even want to go further, we can also get the height and width of the viewport (the visible area of the page).
btnScrollToSection2.addEventListener('click', function (e) {
  // Scroll to section 2
  const s2coords = section2.getBoundingClientRect();
  console.log(s2coords);

  console.log(`X ==> `, window.pageXOffset);
  console.log(`Y ==> `, window.pageYOffset);

  console.log(`Height ==> `, document.documentElement.clientHeight);  console.log(`Width ==> `, document.documentElement.clientWidth);});
Now, the reason we are getting all these coordinates and dimensions is because, we need them to scroll to the desired section. i.e., we need them to tell JavaScript where to scroll to. So, let's now do that.
We will start by using the scrollTo function, which is a global function available on the window object. This function takes two arguments, the first argument is the x-coordinate representing the horizontal scroll position, and the second argument is the y-coordinate representing the vertical scroll position.
btnScrollToSection2.addEventListener('click', function (e) {
  // Scroll to section 2
  const s2coords = section2.getBoundingClientRect();

  window.scrollTo(s2coords.left, s2coords.top);
  /**
   * We could also write this:
   *
   * window.scrollTo(0, s2coords.top);
   *
   * Since we are not interested in scrolling horizontally
   *
   * You've certainly noticed the the value of left and x is 8 and that's
   * because the body tag has a margin value by default. You can set it to 0
   * in your CSS code.
   */
});
Everything now works as expected, but there is one problem. You will notice that if we scroll a little before clicking the button, the page will scroll to the section, but it will not be at the top of the section. This is because the scrollTo function takes the coordinates of the element relative to the viewport, and not the page.

The solution to this problem is to add the current scroll position to the coordinates of the element.
btnScrollToSection2.addEventListener('click', function (e) {
  // Scroll to section 2
  const s2coords = section2.getBoundingClientRect();

  window.scrollTo(
    s2coords.left + window.pageXOffset, // Not really necessary since we are not scrolling horizontally    s2coords.top + window.pageYOffset  );
});
Let's now make this look a little better by adding a smooth scrolling effect. And for that, instead of passing the coordinates to the scrollTo function, we will pass an object with the coordinates and some options.
btnScrollToSection2.addEventListener('click', function (e) {
  // Scroll to section 2
  const s2coords = section2.getBoundingClientRect();

  window.scrollTo({    left: s2coords.left + window.pageXOffset,    top: s2coords.top + window.pageYOffset,    behavior: 'smooth',  });});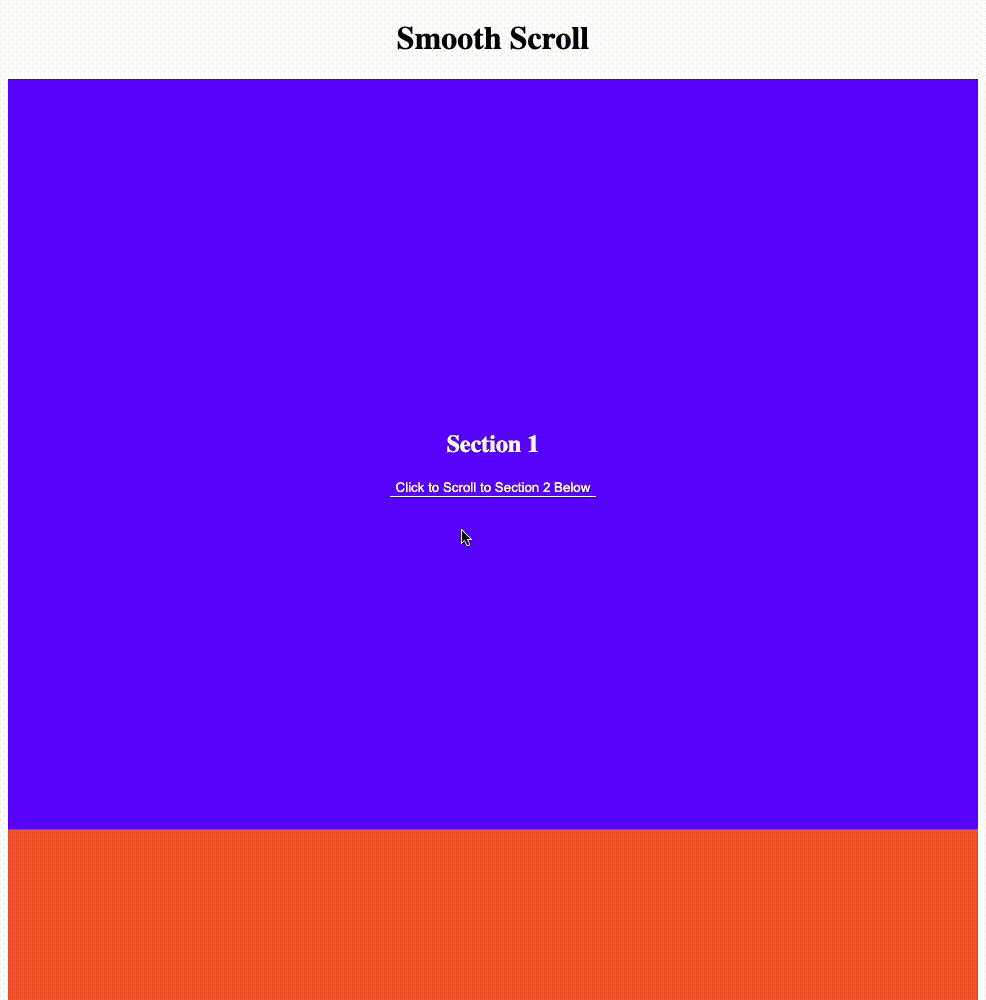
Great! Now, we have a smooth scrolling effect. But, this is actually the old school way of implementing smooth scrolling. There is a more modern way of doing this. All we need to do is to select the element we want to scroll to and call the scrollIntoView method on it.
btnScrollToSection2.addEventListener('click', function (e) {
  // Scroll to section 2
  section2.scrollIntoView({ behavior: 'smooth' });});
Now that you know how to implement smooth scrolling, I want you to try and implement smooth scrolling for the other sections as a challenge. This is a great opportunity to practice what you have learned. So, go ahead and try it out and see you in the next lecture.