const - JS | lectureAdvanced DOM and Events
Styles, Attributes, and Classes

In this lecture, we will learn about styles, attributes, and classes, and you will be able to keep all of the relevant tools here in one simple lecture so that you can reference all of them in the future.
We will continue working with the same HTML code from the previous lecture. So let's get started!
We are going to start by talking about styles. We already set CSS styles before, but there are still more things to learn. But still, let's start with the basics. We can set styles using the style property of an element and then the name of the style we want to set. So let's say we want to set the background color of newDiv element. We can do that like this:
/**
* ‼️ newDiv is the element we created in the previous lecture
*/
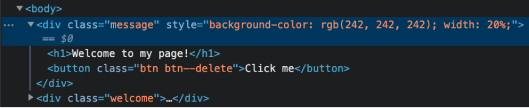
newDiv.style.backgroundColor = '#F2F2F2';
You've noticed that we didn't have to manuelly select the element before. And that's because we already have the element stored in the newDiv variable which we created manually. Next, we can also set the width. So right now, I guess the element takes up the full width of your screen. Let's make it take up only 20% of the screen.
/**
 * Remember to write the CSS values as you would do in CSS.
 */
newDiv.style.width = '20%';
Also, remember that, these styles that we set are added as inline styles.
Now you might think we are also able to read styles using the style property. But let's see what will happen if we try for example to read the height of the element.
console.log(newDiv.style.height);You will notice that nothing is logged to the console. That's because using the style property like we did above, only works for inline styles that we set ourselves. So, it will work for example if we try to read the background color of the element.
console.log(newDiv.style.backgroundColor);
And again we get a value in this case because it is an inline style. .i.e., a style that we manually set ourselves. Also we cannot get a style that we set in a CSS file. So, example let's assume we have a CSS file that looks like this:
.message {
  background-color: #f2f2f2;
  width: 20%;
  color: red;
}
As you can see we have a color property defined in our stylesheet. Now if we try to read the color of the element using the style property, we will get nothing.
console.log(newDiv.style.color); // Nothing is logged to the consoleHowever, we can still get the styles if we really want to. All we need to do is to use the getComputedStyle function. This function takes an element as an argument and returns an object with all the styles that are applied to the element.
console.log(getComputedStyle(newDiv));
You can now see that we get a huge object in the console containing all the styles that are applied to the element. But, in practice what we usually do is to simply take a certain property from the object. So, let's say we want to get the color of the element. We can do that like this:
/**
 * Computed === Real styles as it appears on the screen
 */
console.log('COLOR ==> ' + getComputedStyle(newDiv).color);
We can also get the height of the element even though we didn't set it ourselves. That's because the browser needs to calculate the height of the element in order to display it correctly.
/**
 * Since we didn't set the height ourselves, the browser needs to calculate it.
 * Hence the height you get can be different from mine. 😉
 */
console.log('HEIGHT ==> ' + getComputedStyle(newDiv).height);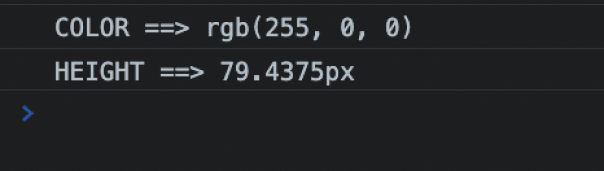
Now let's say we want to increase the height of the element by 60px. We can do that like this:
newDiv.style.height = getComputedStyle(newDiv).height + 60 + 'px';Mmmm, it's not working 😕! It's not working because we are trying to add a number to a string. And we can see that the string returned by the getComputedStyle function has a px at the end. Hence, to fix that, we can use the Number.parseFloat function to parse or take the number out of the string.
newDiv.style.height =
  Number.parseFloat(getComputedStyle(newDiv).height) + 60 + 'px';
Let's move on and now work with CSS custom properties which we usually call CSS variables. Let's assume we have the following CSS code:
:root {
  --primary-color: #ff9255;
}

.message {
  color: var(--primary-color);
}
As you can see, we have our CSS variable defined in the :root selector. Hence, in JavaScript, that's equivalent to the documentElement property. So, to change or set the value of the CSS variable, we need to use the setProperty function. This function takes two arguments, the name of the variable and the value we want to set.
document.documentElement.style.setProperty('--primary-color', '#7a66fb');
Now, let's talk about attributes. Attributes are basically additional pieces of information that we can add to an element. For example, alt for an image or href for a link. And in JavaScript, we can easily access and change their values.
Let's update a little bit our HTML code. Let's add an image section right after the section with the class section-paragraph.
<html lang="en">
  <head class="header">
    ...
  </head>
  <body>
    ...
    <section class="section" id="section-paragraph">...</section>
    <section class="section">      <img        class="section__image"        src="https://source.unsplash.com/EPy0gBJzzZU/640x423"        alt="A beautiful tree!"      />    </section>    ...
  </body>
</html>
Now let's go to our JavaScript code and select the image element.
const image = document.querySelector('.section__image');Now let's try to read the alt and src attributes of the image.
console.log(`ALT ==>  ${image.alt}`);
console.log(`SRC ==> ${image.src}`);
As you can see, we get the expected result. THis works because on images, the alt and src attributes are standard attributes. In other words, they are supposed to be there. Hence if we specify them in HTML, then JavaScript will automatically create these properties on the object.
But, if we add a property that is not standard, then JavaScript will not create it automatically. Let's say we add a property called owner to the image.
<img
  class="section__image"
  src="https://source.unsplash.com/EPy0gBJzzZU/640x423"
  alt="A beautiful tree!"
  owner="Bettie"
/>
If we now try to read the owner attribute, we will get undefined.
console.log(image.owner); // ==> undefinedAgain, that's because, the property owner is not a standard property that's suppose to be on images. However, there is another way of reading this value from the DOM. We can use the getAttribute function. This function takes the name of the attribute as an argument and returns the value of the attribute.
console.log(image.getAttribute('owner')); // ==> BettieBefore we move on to setting attributes, another attribute that works and that's a bit different than you might expect is className.
console.log(image.className); // ==> section__imageYou might think that it should be just class but for historical reasons it has to be className.
Next, just as we can read attributes, we can also set them. Let's say we want to set the alt attribute to A really big tree!.
image.alt = 'A really big tree!';
There is also the opposite of getAttribute which is setAttribute. This function takes two arguments, the name of the attribute and the value we want to set.
image.setAttribute('website', 'unsplash.com');
Finally, there are special types of attributes called data attributes. Data attributes are attributes that start with data- and they are used to store custom data. Let's have a look at the following HTML code.
<img
  class="section__image"
  src="https://source.unsplash.com/EPy0gBJzzZU/640x423"
  alt="A beautiful tree!"
  owner="Bettie"
  data-id="5633f744-9c10-5e84-bc88-09fe4b159641"
/>
What special about this is that we can access the value of the data-id attribute using the dataset property. This property is an object that contains all the data attributes. So, to access the value of the data-id attribute, we can use the id property.
/**
 * Note that if you have a data attribute that has a dash in it, then
 * you need to use camel case to access it.
 *
 * For example, if you have a data attribute called data-my-id, then
 * you need to use dataset.myId to access it.
 */
console.log(image.dataset.id); // ==> 5633f744-9c10-5e84-bc88-09fe4b159641
To finish this lecture, let's talk about classes. Eventhough at this point, we already know all there is to know about classes. So the four most important methods your really need to know are classList.add, classList.remove, classList.toggle and classList.contains. And just as we could read the className property, we can also use it to set.
image.className = 'section__image--big';However, DON'T USE THIS. This will overwrite all the existing classes, and also, it allows us to put only one class on any element.