const - JS | lectureAdvanced DOM and Events
Selecting, Creating, and Deleting Elements

In this lecture, we will learn how to select, create and delete elements with JavaScript. The goal of this lecture is more to be like a quick reference for you in the future because these methods that I'm going to show you here are actually way more difficult to find and understand from the MDN documentation. Hence, when you need some of these methods in the future, then all you have to do is to come back to this lecture and see how it works.
Let's start by learning a little bit more about selecting elements. Before we start, let's consider the below HTML code.
<html lang="en">
  <head class="header">
    <title>Selecting, Creating, and Deleting Elements</title>
  </head>
  <body>
    <div class="welcome">
      <div class="welcome">
        <h4>Hi, I'm Ulrich</h4>
        <h4>I'm a web developer</h4>
        <h4>I love JavaScript</h4>
      </div>
    </div>
    <section class="section" id="section-heading">
      <h1>My First Heading</h1>
    </section>
    <section class="section" id="section-paragraph">
      <p>My first paragraph.</p>
    </section>
    <button class="btn">Say Hi</button>
    <button class="btn">Do something</button>
  </body>
</html>
Now, let's say we want to select our entire document. i.e., our entire HTML document. You might think we only need to log the document object, but that's not the case. However, there exist a special property on the document object called documentElement that we can use to select the very top of our HTML document. Let's see how it works.
const html = document.documentElement;
console.log('Entire HTML document ');
console.log(html);
We can also easily select the head and body elements of our HTML document. Let's see how it works.
const head = document.head;
const body = document.body;

console.log('Head element');
console.log(head);

console.log('Body element');
console.log(body);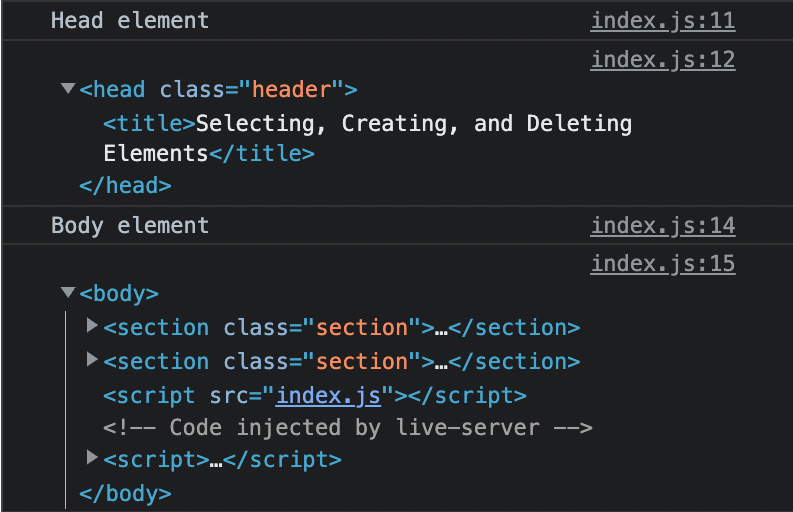
These are of course some special cases were we don't need to write any selector. But otherwise, as you already know, we can use the querySelector method to select elements. For example selecting a header with the class header would look like this.
// Nothing new here 😏
document.querySelector('.header');
This will then return the first element that matches the selector. However, if we want to select all elements that match a certain selector, then we can use the querySelectorAll method. For example, selecting all elements with the class section would look like this.
// Nothing new here 😏
const sections = document.querySelectorAll('.section');
console.log(sections);
As you already know, the querySelectorAll method returns a NodeList containing all the elements that match the selector.

These first couple of methods that we've been using since the beginning of this course are actually the most common and most used methods to select elements. As you learned from the previous lecture, these methods are available not only on the document object, but also on any element. And we actually use it a lot when we want to select child elements of a certain element.
Next, I think we've already talked about getElementById. When using this method, we only pass the id of the element without the # sign. For example, selecting the element with the id section-heading would look like this.
document.getElementById('section-heading');We also have the getElementsByTagName method. All we need to do is to pass the tag name of the element that we want to select. For example, selecting all section elements would look like this.
document.getElementsByTagName('section');
You can see that this method returns an HTMLCollection which is different from the NodeList that we got from the querySelectorAll method. The main difference between these two is that the HTMLCollection is live and the NodeList is not. This means that if we add a new element to the DOM, then the HTMLCollection will automatically update itself and include the new element.
To try this out easily, let's first store the HTMLCollection in a variable and then you can follow the steps below.
const tagSections = document.getElementsByTagName('section');
Finally, we have the getElementsByClassName method. This method is similar to getElementById and getElementsByTagName except that we pass the class name of the element that we want to select. Once again we don't need to pass the . sign. For example, selecting all elements with the class btn would look like this.
// This method also returns an HTMLCollection (A live collection)
document.getElementsByClassName('btn');
Let's now move on to creating and inserting elements. We can create elements using the insertAdjacentHTML method. This method takes two arguments. The first argument is the position where we want to insert the element. The second argument is the HTML code of the element that we want to insert. For example, let's say we want to insert a new section element after the section-heading element. We can do this like this.
const sectionHeading = document.getElementById('section-heading');
sectionHeading.insertAdjacentHTML(
  'afterend',
  '<section class="section"><h1>My Second Heading</h1></section>'
);
Regarding the first argument, there exist four different positions that we can use. These are beforebegin, afterbegin, beforeend, and afterend. The one that we used in the example above means that the new element will be inserted after the sectionHeading element. The other positions are pretty self-explanatory. For example, beforebegin means that the new element will be inserted before the sectionHeading element. Both beforebeginand afterend are conditioned by the by the fact that the sectionHeading element is in the DOM and has a parent element. You can have a clear vizualization of these different positions in the MDN documentation.
The second way to create elements which is more programmatic is by using the createElement method. This method takes one argument which is the tag name of the element that we want to create. For example, let's say we want to create a new div element. We can do this like this.
const newDiv = document.createElement('div');The above createElement method will simply create a new DOM element and store it in the newDiv variable. However, this element is not yet in the DOM. To add it to the DOM, or on our HTML page, we need to manually insert it into the page. But before we do that, there are a couple of things we can do with this DOM element. For example, we can add a class to it.
newDiv.classList.add('message');We can also add some text to it.
newDiv.textContent = 'Welcome to my page!';Next, let's also add some HTML code to it.
/**
 * 💡 Remember that both textContent and innerHTML can be used to
 * read and set content!
 */
newDiv.innerHTML =
  '<h1>Welcome to my page!</h1> <button class="btn">Click me</button>';
Now that we have our element, all we have to do now is to insert it into the DOM. First, I'm going to select the div element with the class welcome and then I'm goig to append the newDiv element to it. Let's do that!
const welcome = document.querySelector('.welcome');
welcome.prepend(newDiv);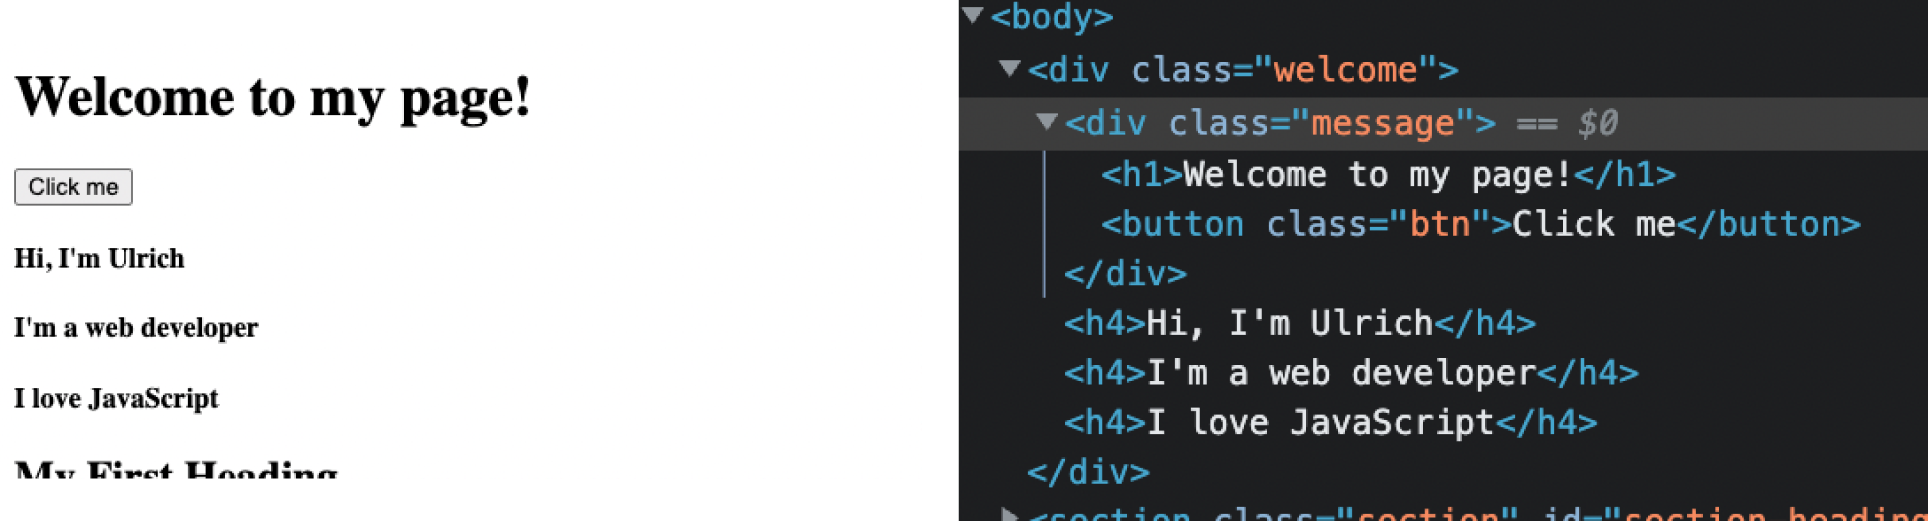
The prepend method is used to insert the element as the first child of the parent element (in this case, the element with the class welcome). We can also add the element as the last child of the parent element by using the append method.
const welcome = document.querySelector('.welcome');
welcome.prepend(newDiv);
welcome.append(newDiv);
From the abive highlighted code, you can see that the append method is preceded by the prepend method. But from the results we had in the browser, we can see that the newDiv element is only inserted once. And that's because the newDiv element is now indeed a live element living in the DOM. Hence it cannot be at multiple places at the same time.
So what happened above is that, we first prepended the element then we appended it. And what the append method did was to move the element from its current position to the end of the parent element. This is why we only see one element in the browser.
What this means is that we can use the append and prepend methods not only to insert elements, but also to move elements around in the DOM. And again, that's because a DOM element is unique. But now, what if we wanted to insert multiple copies of the same element. Well, in that case, we first need to copy the first element.
welcome.prepend(newDiv);

// The value true means that we want to copy the children of the element
welcome.append(newDiv.cloneNode(true));
To finish with insert methods, there are actually two more methods: before and after. As the name says, the before method inserts the element before the parent element and the after method inserts the element after the parent element.
// The newDiv element is inserted before the welcome element
welcome.before(newDiv);
Let's finish this lecture by learning how to delete elements. What we are going to do is to delete the newDiv element that we created above when we click the button Click me. To do that, we first need to select the button and then add an event listener to it.
/**
 * I manually added this class to the button in my code.
 *
 * So first update the code we had above when we used innerHTML on the newDiv element
 *
 * newDiv.innerHTML = '<h1>Welcome to my page!</h1> <button class="btn btn--delete">Click me</button>';
 *
 * We need to add this class to differentiate the button from the other buttons on the page.
 *
 */
document.querySelector('.btn--delete').addEventListener('click', function () {
  newDiv.remove();});
Now when we click the button, the newDiv element is deleted 👌🏽. The remove method is actually recent. Before that, all that could be done was to remove child elements. Hence, before remove, we had to select the parent element and then remove the child element from it. That would look like this.
document.querySelector('.btn--delete').addEventListener('click', function () {
  newDiv.remove();
  newDiv.parentElement.removeChild(newDiv);});
Actually, this way of moving up and down in the DOM tree by selecting the parent element is called DOM traversing. And it's a very important concept in DOM manipulation. But we will talk about it later.