const - JS | lectureDOM & Events Fundamentals
Introduction

In this lecture and the upcoming lectures, we will work on a very simple project called guess my number. As the project's name says, the project's goal is to guess a secret number between 1 and 20.

Credit to @jonasschmedtman
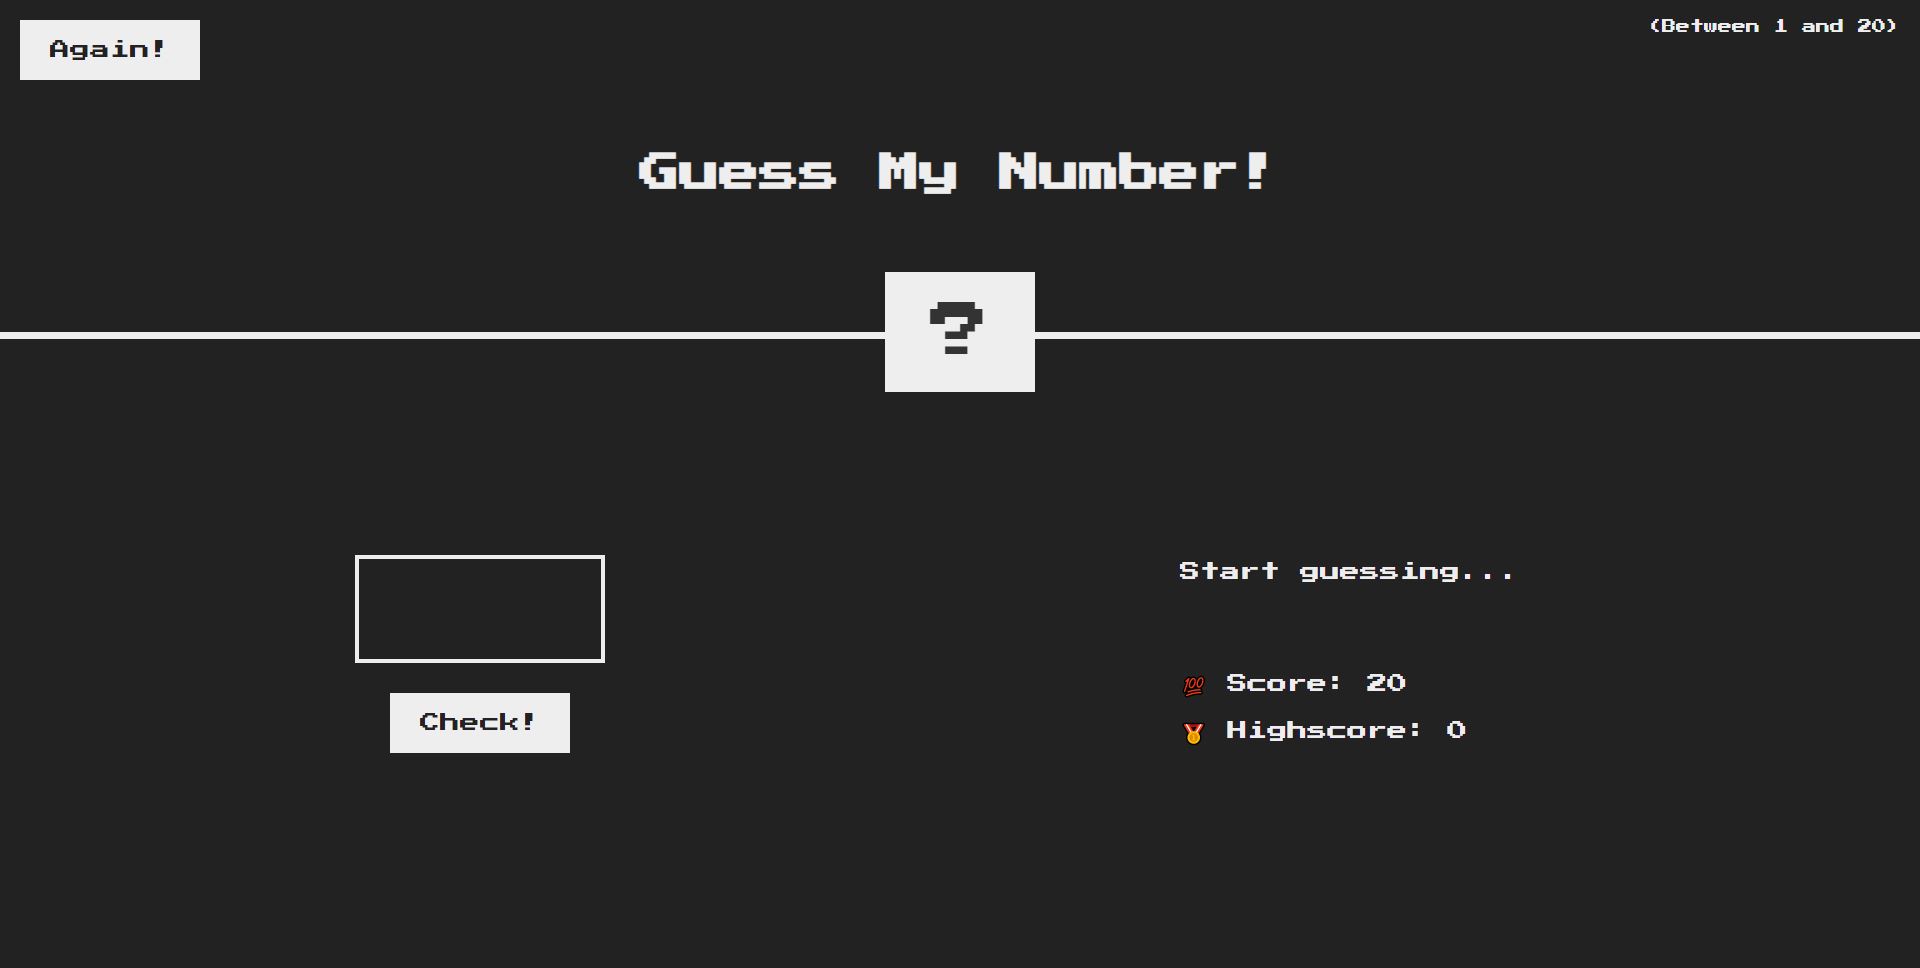
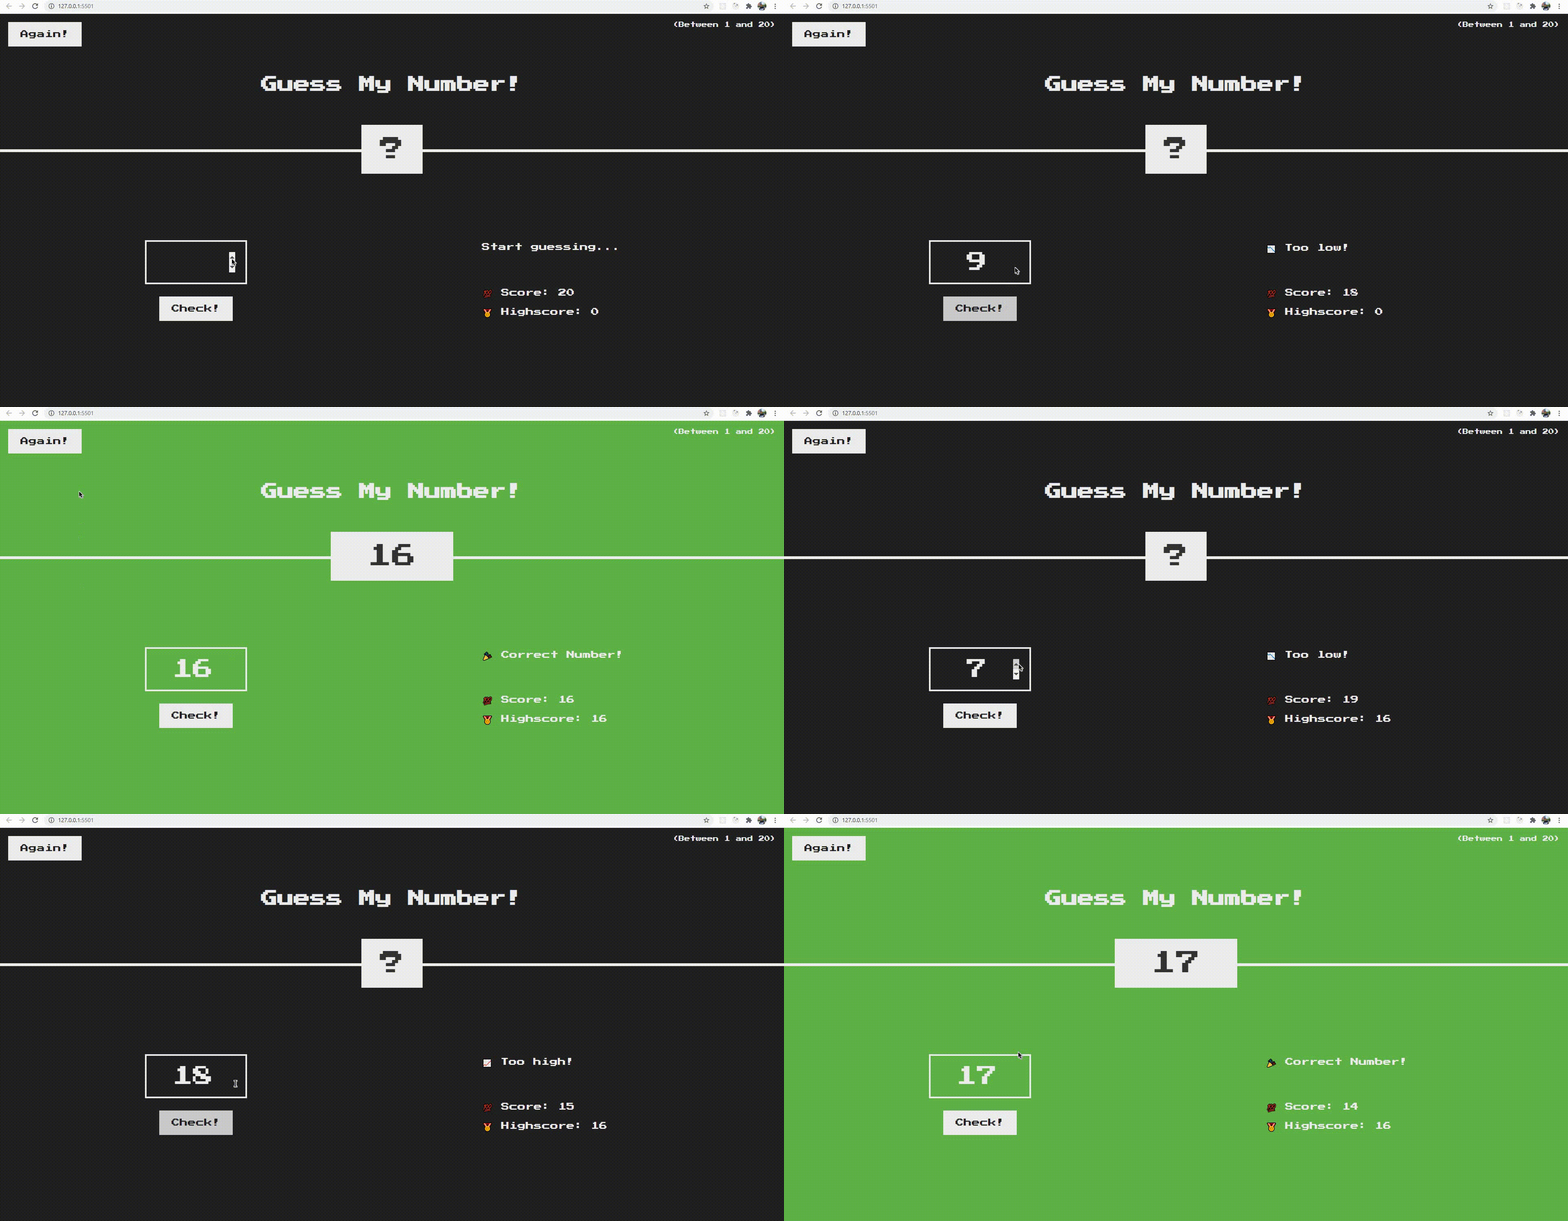
In the input field just above the check button, a user can type a number. When the user clicks on the check button to see if the guessed number is equal to the secret number, the Start guessing... text is replaced by a message saying if the provided number is higher or lower than the secret number or correct in case the user provided the correct number.
If the guessed number is not equal to the secret number, the user's score will decrease or decrement by 1. If the user finally guesses the correct number, or if the game ends and the user hasn't guess the correct number, the user can restart the game by clicking on the again button, and everything will reset except the highest score, which keeps the highest score between each game.
The below demo will give you an idea of what we are going to work on.

With the above demo and explanation, I hope you understand how the project works. So, let's start implementing this. You can download the starter files from this link
You can have a look at the project folder. The most important file in there is the index.html file because that's where we will find the class names of all the different elements that we will have to select to make the project work.
So once again, as you saw in the previous image and demo, all interfaces were built in HTML. The HTML document is made up of small HTML elements. For example, the Start guessing... message you saw on the above image is the paragraph tag with the message class in our HTML file.
<p class="message">Start guessing...</p>In JavaScript, we can select that HTML element based on the message class. Just like we can select elements in CSS, we can do the same in JavaScript.
Before we learn what the DOM and DOM manipulation are, let's quickly learn an easy way of selecting an element in JavaScript. To do so, we write:
// querySelector is a method available on the document object
// .message just like when we select a class in a CSS file
document.querySelector('.message');
To now see the result, you can just log it to the console as we usually do.
console.log(document.querySelector('.message'));To prevent you from reloading your browser to see the results each time you edit and save your code, you can check this article where I show you how to set up the tool live server that will make your life much easier.
Moving on, to get the text Start guessing..., all we have to do is to add the method textContent.
console.log(document.querySelector('.message').textContent);What actually happens here is that document.querySelector('.message') first selects the element (the <p> tag), and now on that element, we can read the text content property reason why we used another dot after the querySelector method. Remember that when we have multiple dot operators, they are executed from left to right.
Great! Now we know how to establish a connection between our code and the interface, in other words, the HTML document displayed in the browser.
This was a quick introduction to the DOM to show you how to select an element. But what is the DOM actually? And what is DOM manipulation? Well, we will answer these questions in the following lecture.